 After
my neighbors, the Begoons, saw my first water garden they liked it very
much. Once they found out how easy it is to create and maintain a pond
they decided that they had to have one in their yard. They asked me
to help them design and create a fish pond. Of course I was more than
happy to help them because I would do just about anything to get some good exercise.
Digging is one of my favorite forms of exercise.
After
my neighbors, the Begoons, saw my first water garden they liked it very
much. Once they found out how easy it is to create and maintain a pond
they decided that they had to have one in their yard. They asked me
to help them design and create a fish pond. Of course I was more than
happy to help them because I would do just about anything to get some good exercise.
Digging is one of my favorite forms of exercise.
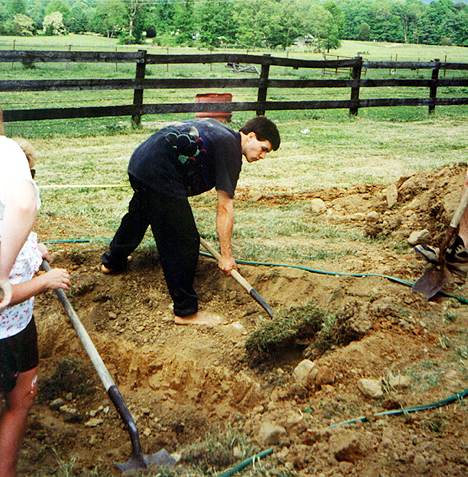
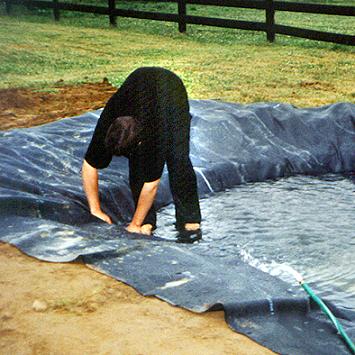
Above is a picture of me helping my neighbors dig the hole for their pond. You can click on the image for a larger version. Digging the hole is actually the second step in constructing a water garden. If you are observant you may notice the old garden hose on the ground around the hole. The garden hose was used during the first step which is design and placement. We used the hose to "draw" the outline for the pond before we began digging so that we could get a mental image of what the pond would look like once completed..
 Once
the hole has been completed, the next step is to put a barrier in the hole to
protect the liner from being punctured. We used sand as the barrier.
Once
the hole has been completed, the next step is to put a barrier in the hole to
protect the liner from being punctured. We used sand as the barrier.
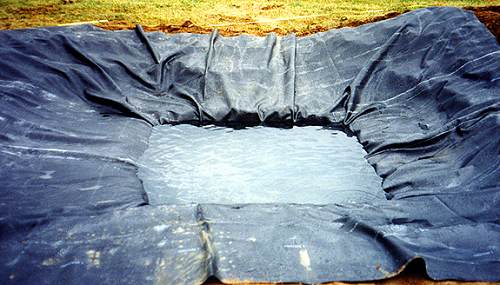
In this picture, the sand has already been installed and the liner has been placed in the hole. We slowly filled the hole with water while I folded the liner so that it would lie flat on the sides of the hole once the pond was completely full. The liner we used is the best liner I know of. It is a thick durable rubber liner made by Firestone. It is MUCH better than the PVC liners that some people use. JMU used PVC liner in their fish pond in the arboretum and it is beginning to crumble now...it's a truly pathetic sight.
 Here
is a better picture of the structure of the pond. I did not have a strong
influence on the design of this pond. I would have NEVER put a square
bottom in a pond. But that is exactly what the Begoons decided to do.
Here
is a better picture of the structure of the pond. I did not have a strong
influence on the design of this pond. I would have NEVER put a square
bottom in a pond. But that is exactly what the Begoons decided to do.
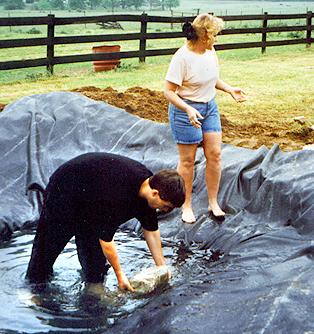 Here
I am placing rocks in the bottom of the pond while Shelley and her husband,
Tommy, have fun carrying rocks from the Bobcat to the pond. The placement
of rocks can be crucial because if they are placed incorrectly they can come out
of place easily and become unsightly. If the rocks are placed correctly
they should stay in relatively the same position for years.
Here
I am placing rocks in the bottom of the pond while Shelley and her husband,
Tommy, have fun carrying rocks from the Bobcat to the pond. The placement
of rocks can be crucial because if they are placed incorrectly they can come out
of place easily and become unsightly. If the rocks are placed correctly
they should stay in relatively the same position for years.
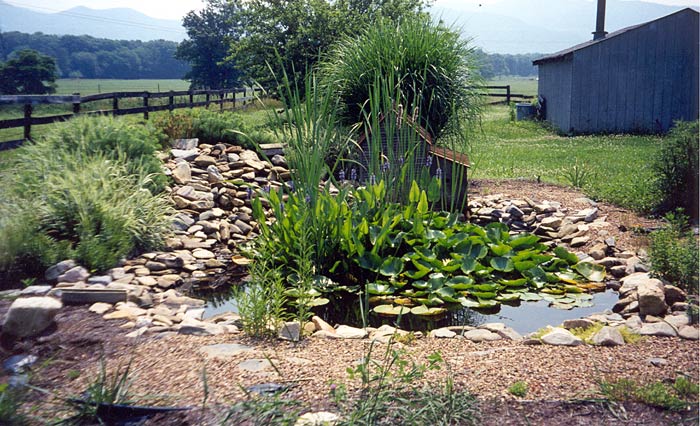
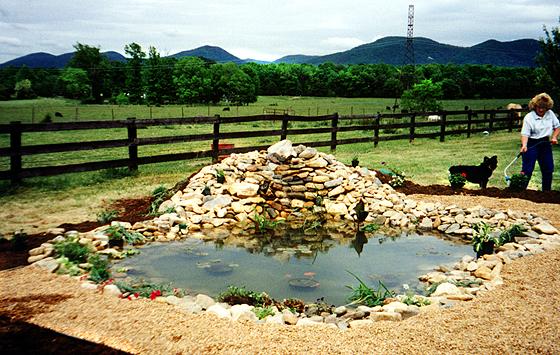 This
is what the pond looked like on the day that it was completed. Click and
take a closer look! I did not bother to show how the waterfall was
constructed, but I can assure you that the installation of a waterfall is very
simple. The entire pond construction process lasted less than a week, but ponds take
several years to mature.
This
is what the pond looked like on the day that it was completed. Click and
take a closer look! I did not bother to show how the waterfall was
constructed, but I can assure you that the installation of a waterfall is very
simple. The entire pond construction process lasted less than a week, but ponds take
several years to mature.
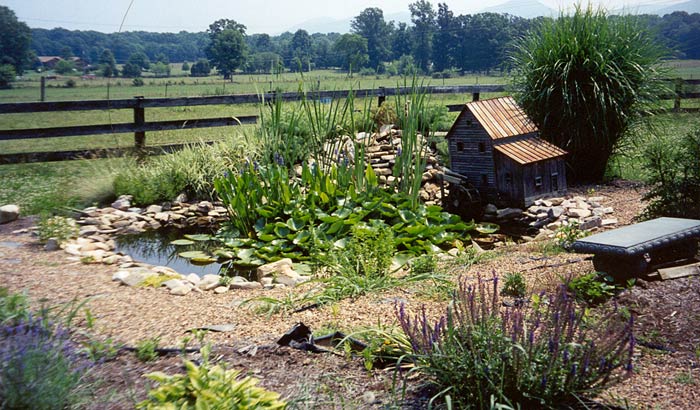
Here's what the pond looked like after three years. Click to enlarge.